React JS 2018
React is a front-end library developed by Facebook. It is used for handling the view layer for web and mobile apps. ReactJS allows us to create reusable UI components. It is currently one of the most popular JavaScript libraries and has a strong foundation and large community behind it.


ReactJS is JavaScript library used for building reusable UI components. According to React official documentation, following is the definition −
React is a library for building composable user interfaces. It encourages the creation of reusable UI components, which present data that changes over time. Lots of people use React as the V in MVC. React abstracts away the DOM from you, offering a simpler programming model and better performance. React can also render on the server using Node, and it can power native apps using React Native. React implements one-way reactive data flow, which reduces the boilerplate and is easier to reason about than traditional data binding.
React Features
- JSX − JSX is JavaScript syntax extension. It isn't necessary to use JSX in React development, but it is recommended.
- Components − React is all about components. You need to think of everything as a component. This will help you maintain the code when working on larger scale projects.
- Unidirectional data flow and Flux − React implements one-way data flow which makes it easy to reason about your app. Flux is a pattern that helps keeping your data unidirectional.
- License − React is licensed under the Facebook Inc. Documentation is licensed under CC BY 4.0.
React Advantages
- Uses virtual DOM which is a JavaScript object. This will improve apps performance, since JavaScript virtual DOM is faster than the regular DOM.
- Can be used on client and server side as well as with other frameworks.
- Component and data patterns improve readability, which helps to maintain larger apps.
React Limitations
- Covers only the view layer of the app, hence you still need to choose other technologies to get a complete tooling set for development.
- Uses inline templating and JSX, which might seem awkward to some developers.
Step 1 - Create the Root Folder
The root folder will be named reactApp and we will place it on Desktop. After the folder is created, we need to open it and create empty package.json file inside by running npm init from the command prompt and follow the instructions.
C:\Users\username\Desktop>mkdir reactApp
C:\Users\username\Desktop\reactApp>npm init
Step 2 - Install Global Packages
We will need to install several packages for this setup. We will need some of the babelplugins, so let's first install babel by running the following code in the command promptwindow.
C:\Users\username\Desktop\reactApp>npm install -g babel
C:\Users\username\Desktop\reactApp>npm install -g babel-cli
Step 3 - Add Dependencies and Plugins
We will use webpack bundler in these tutorial. Let's install webpack and webpack-dev-server.
C:\Users\username\Desktop\reactApp>npm install webpack --save
C:\Users\username\Desktop\reactApp>npm install webpack-dev-server --save
Since we want to use React, we need to install it first. The --save command will add these packages to package.json file.
C:\Users\username\Desktop\reactApp>npm install react --save
C:\Users\username\Desktop\reactApp>npm install react-dom --save
As already mentioned, we will need some babel plugins, so let's install it too.
C:\Users\username\Desktop\reactApp>npm install babel-core
C:\Users\username\Desktop\reactApp>npm install babel-loader
C:\Users\username\Desktop\reactApp>npm install babel-preset-react
C:\Users\username\Desktop\reactApp>npm install babel-preset-es2015
Step 4 - Create the Files
Let's create several files that we need. It can be added manually or using the command prompt.
C:\Users\username\Desktop\reactApp>touch index.html
C:\Users\username\Desktop\reactApp>touch App.jsx
C:\Users\username\Desktop\reactApp>touch main.js
C:\Users\username\Desktop\reactApp>touch webpack.config.js
Alternative way to create files that we need
C:\Users\username\Desktop\reactApp>type nul >index.html
C:\Users\username\Desktop\reactApp>type nul >App.jsx
C:\Users\username\Desktop\reactApp>type nul >main.js
C:\Users\username\Desktop\reactApp>type nul >webpack.config.js
Step 5 - Set Compiler, Server and Loaders
Open webpack.config.js file and add the following code. We are setting webpack entry point to be main.js. Output path is the place where bundled app will be served. We are also setting the development server to 8080 port. You can choose any port you want.
And lastly, we are setting babel loaders to search for js files, and use es2015 and reactpresets that we installed before.
webpack.config.js
var config = {
   entry: './main.js',
   output: {
      path:'/',
      filename: 'index.js',
   },
   devServer: {
      inline: true,
      port: 8080
   },
   module: {
      loaders: [
         {
            test: /\.jsx?$/,
            exclude: /node_modules/,
            loader: 'babel-loader',
            query: {
               presets: ['es2015', 'react']
            }
         }
      ]
   }
}
module.exports = config;
Open the package.json and delete "test" "echo \"Error: no test specified\" && exit 1" inside "scripts" object. We are deleting this line since we will not do any testing in this tutorial. Let's add the start command instead.
"start": "webpack-dev-server --hot"
Before the above step, it will required webpack-dev-server. To install webpack-dev-server, use the following command.
C:\Users\username\Desktop\reactApp>npm install webpack-dev-server -g
Now, we can use npm start command to start the server. --hot command will add live reload after something is changed inside our files so we don't need to refresh the browser every time we change our code.
Step 6 - index.html
This is just regular HTML. We are setting div id = "app" as a root element for our app and adding index.js script, which is our bundled app file.
<!DOCTYPE html>
<html lang = "en">

   <head>
      <meta charset = "UTF-8">
      <title>React App</title>
   </head>

   <body>
      <div id = "app"></div>
      <script src = "index.js"></script>
   </body>

</html>
Step 7 - App.jsx and main.js
This is the first React component. We will explain React components in depth in a subsequent chapter. This component will render Hello World!!!.
App.jsx
import React from 'react';

class App extends React.Component {
   render() {
      return (
         <div>
            Hello World!!!
         </div>
      );
   }
}
export default App;
We need to import this component and render it to our root App element, so we can see it in the browser.
main.js
import React from 'react';
import ReactDOM from 'react-dom';
import App from './App.jsx';

ReactDOM.render(<App />, document.getElementById('app'));
Note − Whenever you want to use something, you need to import it first. If you want to make the component usable in other parts of the app, you need to export it after creation and import it in the file where you want to use it.
Step 8 - Running the Server
The setup is complete and we can start the server by running the following command.
C:\Users\username\Desktop\reactApp>npm start
It will show the port we need to open in the browser. In our case, it is http://localhost:8080/. After we open it, we will see the following output.
React uses JSX for templating instead of regular JavaScript. It is not necessary to use it, however, following are some pros that come with it.
- It is faster because it performs optimization while compiling code to JavaScript.
- It is also type-safe and most of the errors can be caught during compilation.
- It makes it easier and faster to write templates, if you are familiar with HTML.
Using JSX
JSX looks like a regular HTML in most cases. We already used it in the Environment Setup chapter. Look at the code from App.jsx where we are returning div.
App.jsx
import React from 'react';

class App extends React.Component {
   render() {
      return (
         <div>
            Hello World!!!
         </div>
      );
   }
}
export default App;
Even though it's similar to HTML, there are a couple of things we need to keep in mind when working with JSX.
Nested Elements
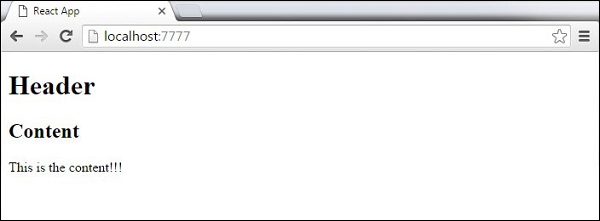
If we want to return more elements, we need to wrap it with one container element. Notice how we are using div as a wrapper for h1, h2 and pelements.
App.jsx
import React from 'react';

class App extends React.Component {
   render() {
      return (
         <div>
            <h1>Header</h1>
            <h2>Content</h2>
            <p>This is the content!!!</p>
         </div>
      );
   }
}
export default App;
Attributes
We can use our own custom attributes in addition to regular HTML properties and attributes. When we want to add custom attribute, we need to use data-prefix. In the following example, we added data-myattribute as an attribute of p element.
import React from 'react';

class App extends React.Component {
   render() {
      return (
         <div>
            <h1>Header</h1>
            <h2>Content</h2>
            <p data-myattribute = "somevalue">This is the content!!!</p>
         </div>
      );
   }
}
export default App;
JavaScript Expressions
JavaScript expressions can be used inside of JSX. We just need to wrap it with curly brackets {}. The following example will render 2.
import React from 'react';

class App extends React.Component {
   render() {
      return (
         <div>
            <h1>{1+1}</h1>
         </div>
      );
   }
}
export default App;
We cannot use if else statements inside JSX, instead we can use conditional (ternary) expressions. In the following example, variable i equals to 1 so the browser will render true, If we change it to some other value, it will render false.
import React from 'react';

class App extends React.Component {
   render() {
      var i = 1;
      return (
         <div>
            <h1>{i == 1 ? 'True!' : 'False'}</h1>
         </div>
      );
   }
}
export default App;
Styling
React recommends using inline styles. When we want to set inline styles, we need to use camelCase syntax. React will also automatically append px after the number value on specific elements. The following example shows how to add myStyle inline to h1 element.
import React from 'react';

class App extends React.Component {
   render() {
      var myStyle = {
         fontSize: 100,
         color: '#FF0000'
      }
      return (
         <div>
            <h1 style = {myStyle}>Header</h1>
         </div>
      );
   }
}
export default App;
Comments
When writing comments, we need to put curly brackets {} when we want to write comment within children section of a tag. It is a good practice to always use {} when writing comments, since we want to be consistent when writing the app.
import React from 'react';

class App extends React.Component {
   render() {
      return (
         <div>
            <h1>Header</h1>
            {//End of the line Comment...}
            {/*Multi line comment...*/}
         </div>
      );
   }
}
export default App;
Naming Convention
HTML tags always use lowercase tag names, while React components start with Uppercase.
Note − You should use className and htmlFor as XML attribute names instead of class and for.
This is explained on React official page as −
Since JSX is JavaScript, identifiers such as class and for are discouraged as XML attribute names. Instead, React DOM components expect DOM property names such as className and htmlFor, respectively.
In this chapter, we will learn how to combine components to make the app easier to maintain. This approach allows to update and change your components without affecting the rest of the page.
Stateless Example
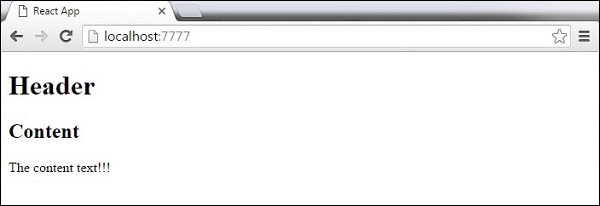
Our first component in the following example is App. This component is owner of Headerand Content. We are creating Header and Content separately and just adding it inside JSX tree in our App component. Only App component needs to be exported.
App.jsx
import React from 'react';

class App extends React.Component {
   render() {
      return (
         <div>
            <Header/>
            <Content/>
         </div>
      );
   }
}
class Header extends React.Component {
   render() {
      return (
         <div>
            <h1>Header</h1>
         </div>
      );
   }
}
class Content extends React.Component {
   render() {
      return (
         <div>
            <h2>Content</h2>
            <p>The content text!!!</p>
         </div>
      );
   }
}
export default App;
To be able to render this on the page, we need to import it in main.js file and call reactDOM.render(). We already did this while setting the environment.
main.js
import React from 'react';
import ReactDOM from 'react-dom';
import App from './App.jsx';

ReactDOM.render(<App />, document.getElementById('app'));
The above code will generate the following result.
Stateful Example
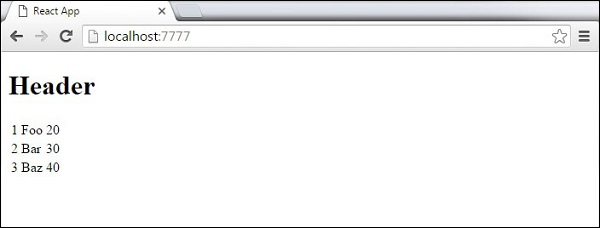
In this example, we will set the state for owner component (App). The Header component is just added like in the last example since it doesn't need any state. Instead of content tag, we are creating table and tbody elements, where we will dynamically insert TableRow for every object from the data array.
It can be seen that we are using EcmaScript 2015 arrow syntax (⇒) which looks much cleaner than the old JavaScript syntax. This will help us create our elements with fewer lines of code. It is especially useful when we need to create a list with a lot of items.
App.jsx
import React from 'react';

class App extends React.Component {
   constructor() {
      super();
      this.state = {
         data:
         [
            {
               "id":1,
               "name":"Foo",
               "age":"20"
            },
            {
               "id":2,
               "name":"Bar",
               "age":"30"
            },
            {
               "id":3,
               "name":"Baz",
               "age":"40"
            }
         ]
      }
   }
   render() {
      return (
         <div>
            <Header/>
            <table>
               <tbody>
                  {this.state.data.map((person, i) => <TableRow key = {i}
                     data = {person} />)}
               </tbody>
            </table>
         </div>
      );
   }
}
class Header extends React.Component {
   render() {
      return (
         <div>
            <h1>Header</h1>
         </div>
      );
   }
}
class TableRow extends React.Component {
   render() {
      return (
         <tr>
            <td>{this.props.data.id}</td>
            <td>{this.props.data.name}</td>
            <td>{this.props.data.age}</td>
         </tr>
      );
   }
}
export default App;
main.js
import React from 'react';
import ReactDOM from 'react-dom';
import App from './App.jsx';

ReactDOM.render(<App/>, document.getElementById('app'));
Note − Notice that we are using key = {i} inside map() function. This will help React to update only the necessary elements instead of re-rendering the entire list when something changes. It is a huge performance boost for larger number of dynamically created elements.
State is the place where the data comes from. We should always try to make our state as simple as possible and minimize the number of stateful components. If we have, for example, ten components that need data from the state, we should create one container component that will keep the state for all of them.
Using Props
The following sample code shows how to create a stateful component using EcmaScript2016 syntax.
App.jsx
import React from 'react';

class App extends React.Component {
   constructor(props) {
      super(props);

      this.state = {
         header: "Header from state...",
         content: "Content from state..."
      }
   }
   render() {
      return (
         <div>
            <h1>{this.state.header}</h1>
            <h2>{this.state.content}</h2>
         </div>
      );
   }
}
export default App;
main.js
import React from 'react';
import ReactDOM from 'react-dom';
import App from './App.jsx';

ReactDOM.render(<App />, document.getElementById('app'));
This will produce the following result.
State and Props
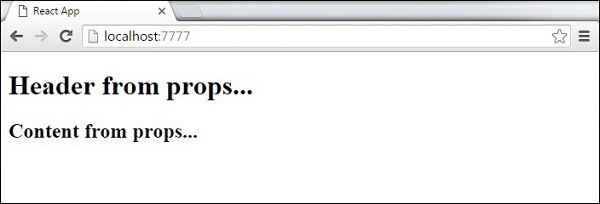
The following example shows how to combine state and props in your app. We are setting the state in our parent component and passing it down the component tree using props. Inside the render function, we are setting headerProp and contentProp used in child components.
App.jsx
import React from 'react';

class App extends React.Component {
   constructor(props) {
      super(props);
      this.state = {
         header: "Header from props...",
         content: "Content from props..."
      }
   }
   render() {
      return (
         <div>
            <Header headerProp = {this.state.header}/>
            <Content contentProp = {this.state.content}/>
         </div>
      );
   }
}
class Header extends React.Component {
   render() {
      return (
         <div>
            <h1>{this.props.headerProp}</h1>
         </div>
      );
   }
}
class Content extends React.Component {
   render() {
      return (
         <div>
            <h2>{this.props.contentProp}</h2>
         </div>
      );
   }
}
export default App;
main.js
import React from 'react';
import ReactDOM from 'react-dom';
import App from './App.jsx';

ReactDOM.render(<App/>, document.getElementById('app'));
The result will again be the same as in the previous two examples, the only thing that is different is the source of our data, which is now originally coming from the state. When we want to update it, we just need to update the state, and all child components will be updated. More on this in the Events chapter.
Props Validation


Properties validation is a useful way to force the correct usage of the components. This will help during development to avoid future bugs and problems, once the app becomes larger. It also makes the code more readable, since we can see how each component should be used.
Validating Props
In this example, we are creating App component with all the props that we need. App.propTypes is used for props validation. If some of the props aren't using the correct type that we assigned, we will get a console warning. After we specify validation patterns, we will set App.defaultProps.
App.jsx
import PropTypes from 'prop-types';
import React from 'react';
import ReactDOM from 'react-dom';

class App extends React.Component {
   render() {
      return (
         <div>
            <h1> Hello, {this.props.name} </h1>
            <h3>Array: {this.props.propArray}</h3>
            <h3>Bool: {this.props.propBool ? "True..." : "False..."}</h3>
            <h3>Func: {this.props.propFunc(3)}</h3>
            <h3>Number: {this.props.propNumber}</h3>
            <h3>String: {this.props.propString}</h3>
         </div>
      );
   }
}
App.propTypes = {
   name: PropTypes.string,
   propArray: PropTypes.array.isRequired,
   propBool: PropTypes.bool.isRequired,
   propFunc: PropTypes.func,
   propNumber: PropTypes.number,
   propString: PropTypes.string,
};
App.defaultProps = {
   name: 'Tutorialspoint.com',
   propArray: [1, 2, 3, 4, 5],
   propBool: true,
   propFunc: function(e) {
      return e
   },
   propNumber: 1,
   propString: "String value..."
}
export default App;
main.js
import React from 'react';
import PropTypes from 'prop-types';
import ReactDOM from 'react-dom';
import App from './App.jsx';

ReactDOM.render(<App/>, document.getElementById('app'));
webpack.config.js
var config = {
   entry: './main.js',

   output: {
      path:'/',
      filename: 'index.js',
   },
   devServer: {
      inline: true,
      port: 8080
   },
   externals: {
      'react': 'React'
   },
   module: {
      loaders: [
         {
            test: /\.jsx?$/,
            exclude: /node_modules/,
            loader: 'babel-loader',

            query: {
               presets: ['es2015', 'react']
            }
         }
      ]
   }
}
module.exports = config;
Since all props are valid, we will get the following result.
As can be noticed, we have use isRequired when validating propArray and propBool. This will give us an error, if one of those two don't exist. If we delete propArray:[1,2,3,4,5] from the App.defaultProps object, the console will log a warning.
If we set the value of propArray: 1, React will warn us that the propType validation has failed, since we need an array and we got a number.
In this chapter, we will explain React component API. We will discuss three methods: setState(), forceUpdate and ReactDOM.findDOMNode(). In new ES6 classes, we have to manually bind this. We will use this.method.bind(this) in the examples.
Set State
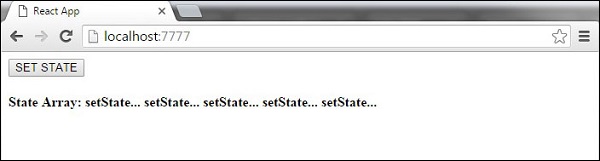
setState() method is used to update the state of the component. This method will not replace the state, but only add changes to the original state.
import React from 'react';

class App extends React.Component {
   constructor() {
      super();

      this.state = {
         data: []
      }

      this.setStateHandler = this.setStateHandler.bind(this);
   };
   setStateHandler() {
      var item = "setState..."
      var myArray = this.state.data.slice();
   myArray.push(item);
      this.setState({data: myArray})
   };
   render() {
      return (
         <div>
            <button onClick = {this.setStateHandler}>SET STATE</button>
            <h4>State Array: {this.state.data}</h4>
         </div>
      );
   }
}
export default App;
We started with an empty array. Every time we click the button, the state will be updated. If we click five times, we will get the following output.
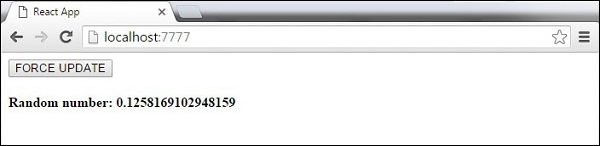
Force Update
Sometimes we might want to update the component manually. This can be achieved using the forceUpdate() method.
import React from 'react';

class App extends React.Component {
   constructor() {
      super();
      this.forceUpdateHandler = this.forceUpdateHandler.bind(this);
   };
   forceUpdateHandler() {
      this.forceUpdate();
   };
   render() {
      return (
         <div>
            <button onClick = {this.forceUpdateHandler}>FORCE UPDATE</button>
            <h4>Random number: {Math.random()}</h4>
         </div>
      );
   }
}
export default App;
We are setting a random number that will be updated every time the button is clicked.
Find Dom Node
For DOM manipulation, we can use ReactDOM.findDOMNode() method. First we need to import react-dom.
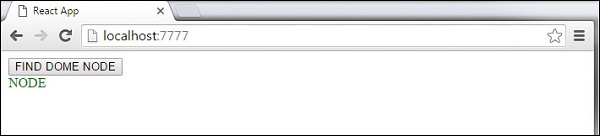
import React from 'react';
import ReactDOM from 'react-dom';

class App extends React.Component {
   constructor() {
      super();
      this.findDomNodeHandler = this.findDomNodeHandler.bind(this);
   };
   findDomNodeHandler() {
      var myDiv = document.getElementById('myDiv');
      ReactDOM.findDOMNode(myDiv).style.color = 'green';
   }
   render() {
      return (
         <div>
            <button onClick = {this.findDomNodeHandler}>FIND DOME NODE</button>
            <div id = "myDiv">NODE</div>
         </div>
      );
   }
}
export default App;
The color of myDiv element changes to green, once the button is clicked.
Note − Since the 0.14 update, most of the older component API methods are deprecated or removed to accommodate ES6.
In this chapter, we will discuss component lifecycle methods.
Lifecycle Methods
- componentWillMount is executed before rendering, on both the server and the client side.
- componentDidMount is executed after the first render only on the client side. This is where AJAX requests and DOM or state updates should occur. This method is also used for integration with other JavaScript frameworks and any functions with delayed execution such as setTimeout or setInterval. We are using it to update the state so we can trigger the other lifecycle methods.
- componentWillReceiveProps is invoked as soon as the props are updated before another render is called. We triggered it from setNewNumber when we updated the state.
- shouldComponentUpdate should return true or false value. This will determine if the component will be updated or not. This is set to true by default. If you are sure that the component doesn't need to render after state or props are updated, you can return false value.
- componentWillUpdate is called just before rendering.
- componentDidUpdate is called just after rendering.
- componentWillUnmount is called after the component is unmounted from the dom. We are unmounting our component in main.js.
In the following example, we will set the initial state in the constructor function. The setNewnumber is used to update the state. All the lifecycle methods are inside the Content component.
App.jsx
import React from 'react';

class App extends React.Component {
   constructor(props) {
      super(props);

      this.state = {
         data: 0
      }
      this.setNewNumber = this.setNewNumber.bind(this)
   };
   setNewNumber() {
      this.setState({data: this.state.data + 1})
   }
   render() {
      return (
         <div>
            <button onClick = {this.setNewNumber}>INCREMENT</button>
            <Content myNumber = {this.state.data}></Content>
         </div>
      );
   }
}
class Content extends React.Component {
   componentWillMount() {
      console.log('Component WILL MOUNT!')
   }
   componentDidMount() {
      console.log('Component DID MOUNT!')
   }
   componentWillReceiveProps(newProps) {
      console.log('Component WILL RECIEVE PROPS!')
   }
   shouldComponentUpdate(newProps, newState) {
      return true;
   }
   componentWillUpdate(nextProps, nextState) {
      console.log('Component WILL UPDATE!');
   }
   componentDidUpdate(prevProps, prevState) {
      console.log('Component DID UPDATE!')
   }
   componentWillUnmount() {
      console.log('Component WILL UNMOUNT!')
   }
   render() {
      return (
         <div>
            <h3>{this.props.myNumber}</h3>
         </div>
      );
   }
}
export default App;
main.js
import React from 'react';
import ReactDOM from 'react-dom';
import App from './App.jsx';

ReactDOM.render(<App/>, document.getElementById('app'));

setTimeout(() => {
   ReactDOM.unmountComponentAtNode(document.getElementById('app'));}, 10000);
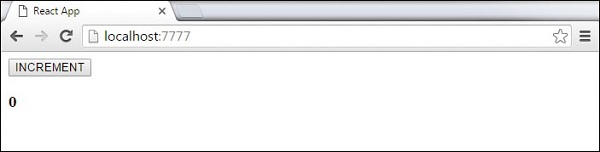
After the initial render, we will get the following screen.
Only componentWillMount and componentDidMount will be logged in the console, since we didn't update anything yet.
When we click the INCREMENT button, the update will occur and other lifecycle methods will be triggered.
After ten seconds, the component will unmount and the last event will be logged in the console.
Note − Lifecycle methods will always be invoked in the same order so it is a good practice to write it in the correct order as shown in the example.
In this chapter, we will learn how to use forms in React.
Simple Example
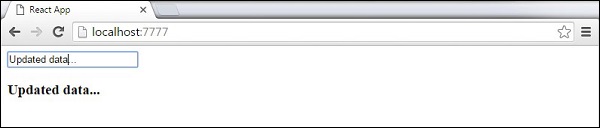
In the following example, we will set an input form with value = {this.state.data}. This allows to update the state whenever the input value changes. We are using onChangeevent that will watch the input changes and update the state accordingly.
App.jsx
import React from 'react';

class App extends React.Component {
   constructor(props) {
      super(props);

      this.state = {
         data: 'Initial data...'
      }
      this.updateState = this.updateState.bind(this);
   };
   updateState(e) {
      this.setState({data: e.target.value});
   }
   render() {
      return (
         <div>
            <input type = "text" value = {this.state.data}
               onChange = {this.updateState} />
            <h4>{this.state.data}</h4>
         </div>
      );
   }
}
export default App;
main.js
import React from 'react';
import ReactDOM from 'react-dom';
import App from './App.jsx';

ReactDOM.render(<App/>, document.getElementById('app'));
When the input text value changes, the state will be updated.
Complex Example
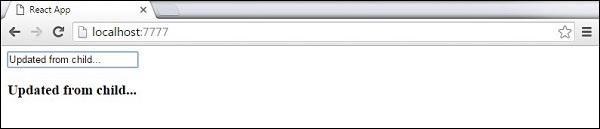
In the following example, we will see how to use forms from child component. onChangemethod will trigger state update that will be passed to the child input value and rendered on the screen. A similar example is used in the Events chapter. Whenever we need to update state from child component, we need to pass the function that will handle updating (updateState) as a prop (updateStateProp).
App.jsx
import React from 'react';

class App extends React.Component {
   constructor(props) {
      super(props);

      this.state = {
         data: 'Initial data...'
      }
      this.updateState = this.updateState.bind(this);
   };
   updateState(e) {
      this.setState({data: e.target.value});
   }
   render() {
      return (
         <div>
            <Content myDataProp = {this.state.data}
               updateStateProp = {this.updateState}></Content>
         </div>
      );
   }
}
class Content extends React.Component {
   render() {
      return (
         <div>
            <input type = "text" value = {this.props.myDataProp}
               onChange = {this.props.updateStateProp} />
            <h3>{this.props.myDataProp}</h3>
         </div>
      );
   }
}
export default App;
main.js
import React from 'react';
import ReactDOM from 'react-dom';
import App from './App.jsx';

ReactDOM.render(<App/>, document.getElementById('app'));
This will produce the following result.
Events
In this chapter, we will learn how to use events.
Simple Example
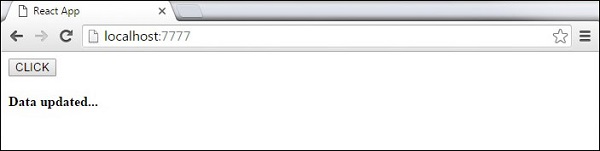
This is a simple example where we will only use one component. We are just adding onClick event that will trigger updateState function once the button is clicked.
App.jsx
import React from 'react';

class App extends React.Component {
   constructor(props) {
      super(props);

      this.state = {
         data: 'Initial data...'
      }
      this.updateState = this.updateState.bind(this);
   };
   updateState() {
      this.setState({data: 'Data updated...'})
   }
   render() {
      return (
         <div>
            <button onClick = {this.updateState}>CLICK</button>
            <h4>{this.state.data}</h4>
         </div>
      );
   }
}
export default App;
main.js
import React from 'react';
import ReactDOM from 'react-dom';
import App from './App.jsx';

ReactDOM.render(<App/>, document.getElementById('app'));
This will produce the following result.
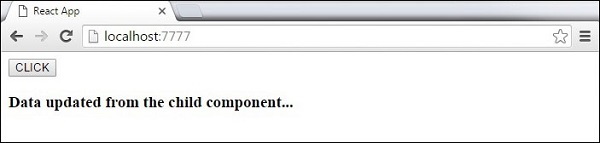
Child Events
When we need to update the state of the parent component from its child, we can create an event handler (updateState) in the parent component and pass it as a prop (updateStateProp) to the child component where we can just call it.
App.jsx
import React from 'react';

class App extends React.Component {
   constructor(props) {
      super(props);

      this.state = {
         data: 'Initial data...'
      }
      this.updateState = this.updateState.bind(this);
   };
   updateState() {
      this.setState({data: 'Data updated from the child component...'})
   }
   render() {
      return (
         <div>
            <Content myDataProp = {this.state.data}
               updateStateProp = {this.updateState}></Content>
         </div>
      );
   }
}
class Content extends React.Component {
   render() {
      return (
         <div>
            <button onClick = {this.props.updateStateProp}>CLICK</button>
            <h3>{this.props.myDataProp}</h3>
         </div>
      );
   }
}
export default App;
main.js
import React from 'react';
import ReactDOM from 'react-dom';
import App from './App.jsx';

ReactDOM.render(<App/>, document.getElementById('app'));
This will produce the following result.
Ref
The ref is used to return a reference to the element. Refs should be avoided in most cases, however, they can be useful when we need DOM measurements or to add methods to the components.
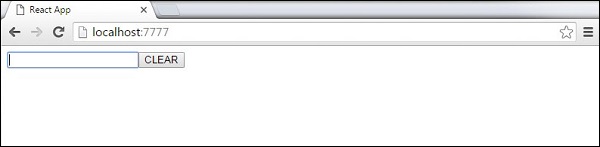
Using Refs
The following example shows how to use refs to clear the input field. ClearInput function searches for element with ref = "myInput" value, resets the state, and adds focus to it after the button is clicked.
App.jsx
import React from 'react';
import ReactDOM from 'react-dom';

class App extends React.Component {
   constructor(props) {
      super(props);

      this.state = {
         data: ''
      }
      this.updateState = this.updateState.bind(this);
      this.clearInput = this.clearInput.bind(this);
   };
   updateState(e) {
      this.setState({data: e.target.value});
   }
   clearInput() {
      this.setState({data: ''});
      ReactDOM.findDOMNode(this.refs.myInput).focus();
   }
   render() {
      return (
         <div>
            <input value = {this.state.data} onChange = {this.updateState}
               ref = "myInput"></input>
            <button onClick = {this.clearInput}>CLEAR</button>
            <h4>{this.state.data}</h4>
         </div>
      );
   }
}
export default App;
main.js
import React from 'react';
import ReactDOM from 'react-dom';
import App from './App.jsx';

ReactDOM.render(<App/>, document.getElementById('app'));
Once the button is clicked, the input will be cleared and focused.
keys
React keys are useful when working with dynamically created components or when your lists are altered by the users. Setting the key value will keep your components uniquely identified after the change.
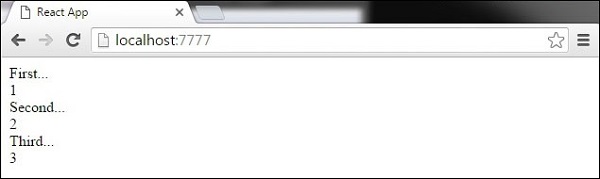
Using Keys
Let's dynamically create Content elements with unique index (i). The map function will create three elements from our data array. Since the key value needs to be unique for every element, we will assign i as a key for each created element.
App.jsx
import React from 'react';

class App extends React.Component {
   constructor() {
      super();

      this.state = {
         data:[
            {
               component: 'First...',
               id: 1
            },
            {
               component: 'Second...',
               id: 2
            },
            {
               component: 'Third...',
               id: 3
            }
         ]
      }
   }
   render() {
      return (
         <div>
            <div>
               {this.state.data.map((dynamicComponent, i) => <Content
                  key = {i} componentData = {dynamicComponent}/>)}
            </div>
         </div>
      );
   }
}
class Content extends React.Component {
   render() {
      return (
         <div>
            <div>{this.props.componentData.component}</div>
            <div>{this.props.componentData.id}</div>
         </div>
      );
   }
}
export default App;
main.js
import React from 'react';
import ReactDOM from 'react-dom';
import App from './App.jsx';

ReactDOM.render(<App/>, document.getElementById('app'));
We will get the following result for the Key values of each element.
If we add or remove some elements in the future or change the order of the dynamically created elements, React will use the key values to keep track of each element.
In this chapter, we will learn how to set up routing for an app.
Step 1 - Install a React Router
A simple way to install the react-router is to run the following code snippet in the command prompt window.
C:\Users\username\Desktop\reactApp>npm install react-router-dom
Configure the .babelrc file in the root of the project as shown below-
C:\Users\username\Desktop\reactApp>\type nul>.babelrc
Add the following code in .babelrc file
{
  "presets": ["es2015", "react"]
}
Create a file as index.html in a root directory and the following code -
<!DOCTYPE html>
<html lang = "en">

   <head>
      <meta charset = "UTF-8">
      <title>React Router Tutorial</title>
   </head>

   <body>
      <div id = "app"></div>
      <script type = "text/javascript" src = "bundle.js"></script>
   </body>

</html>
To configure webpack.config.js file, add the following code in webpack.config.js
module.exports = {
   entry: './app/main.js',
   output: {
      filename: 'bundle.js'
   },
   module: {
      loaders: [
         {
            loader: 'babel-loader',
            test: /\.js$/,
            exclude: /node_modules/
         }
      ]
   },
   devServer: {
      port: 7777
   }
};
Step 2 - Add a Router
Now, we will add routes to the app. Instead of rendering App element like in the previous example, create a directory named as App and create files and named as main.js and App.js
Main.js
import React from 'react';
import { render } from 'react-dom';
import App from './App';

render(<App />, document.getElementById('app'));
App.js
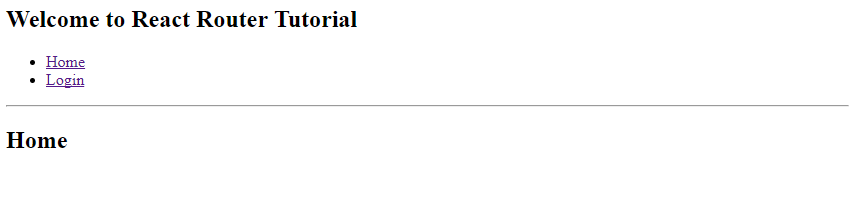
import React, { Component } from 'react';
import { BrowserRouter as Router, Switch, Route, Link } from 'react-router-dom';
import Home from './Home';
import Login from './Login';

class App extends Component {
   render() {
      return (
         <Router>
            <div>
               <h2>Welcome to React Router Tutorial</h2>
               <ul>
                  <li><Link to={'/'}>Home</Link></li>
                  <li><Link to={'/Login'}>Login</Link></li>
               </ul>
               <hr />

               <Switch>
                  <Route exact path='/' component={Home} />
                  <Route exact path='/Login' component={Login} />
               </Switch>
            </div>
         </Router>
      );
   }
}
export default App;
Step 3 - Create Components
In this step, we will create two components as (Home)and (Login) in App directory.
Home.js
import React, { Component } from 'react';

class Home extends Component {
   render() {
      return (
         <div>
            <h2>Home</h2>
         </div>
      );
   }
}
export default Home;
Login.js
import React, { Component } from 'react';
import ReactDOM from 'react-dom';

class Login extends Component {
   render() {
      return (
         <div>
            <h2>Login</h2>
         </div>
      );
   }
}
export default Login;
When the app is started, we will see two clickable links that can be used to change the route.
Flux is a programming concept, where the data is uni-directional. This data enters the app and flows through it in one direction until it is rendered on the screen.
Flux Elements
Following is a simple explanation of the flux concept. In the next chapter, we will learn how to implement this into the app.
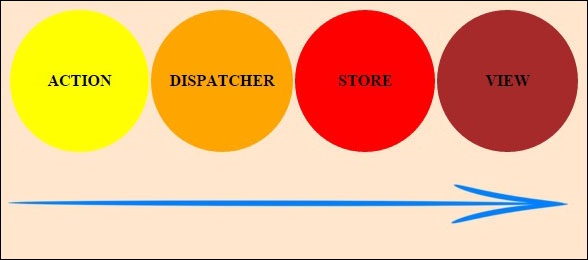
- Actions − Actions are sent to the dispatcher to trigger the data flow.
- Dispatcher − This is a central hub of the app. All the data is dispatched and sent to the stores.
- Store − Store is the place where the application state and logic are held. Every store is maintaining a particular state and it will update when needed.
- View − The view will receive data from the store and re-render the app.
The data flow is depicted in the following image.
Flux Pros
- Single directional data flow is easy to understand.
- The app is easier to maintain.
- The app parts are decoupled.
In this chapter, we will learn how to implement flux pattern in React applications. We will use Redux framework. The goal of this chapter is to present the simplest example of every piece needed for connecting Redux and React.
Step 1 - Install Redux
We will install Redux via the command prompt window.
C:\Users\username\Desktop\reactApp>npm install --save react-redux
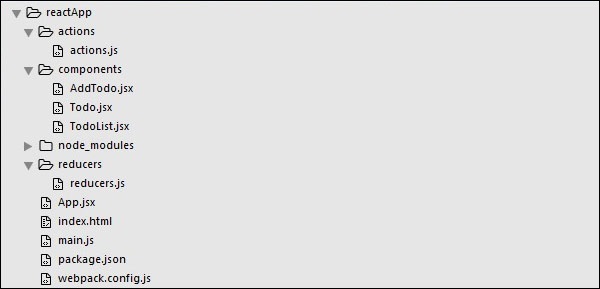
Step 2 - Create Files and Folders
In this step, we will create folders and files for our actions, reducers, and components. After we are done with it, this is how the folder structure will look like.
Step 3 - Actions
Actions are JavaScript objects that use type property to inform about the data that should be sent to the store. We are defining ADD_TODO action that will be used for adding new item to our list. The addTodo function is an action creator that returns our action and sets an id for every created item.
actions/actions.js
export const ADD_TODO = 'ADD_TODO'

let nextTodoId = 0;

export function addTodo(text) {
   return {
      type: ADD_TODO,
      id: nextTodoId++,
      text
   };
}
Step 4 - Reducers
While actions only trigger changes in the app, the reducers specify those changes. We are using switch statement to search for a ADD_TODO action. The reducer is a function that takes two parameters (state and action) to calculate and return an updated state.
The first function will be used to create a new item, while the second one will push that item to the list. Towards the end, we are using combineReducers helper function where we can add any new reducers we might use in the future.
reducers/reducers.js
import { combineReducers } from 'redux'
import { ADD_TODO } from '../actions/actions'

function todo(state, action) {
   switch (action.type) {
      case ADD_TODO:
         return {
            id: action.id,
            text: action.text,
         }
      default:
         return state
   }
}
function todos(state = [], action) {
   switch (action.type) {
      case ADD_TODO:
         return [
            ...state,
            todo(undefined, action)
         ]
      default:
         return state
   }
}
const todoApp = combineReducers({
   todos
})
export default todoApp
Step 5 - Store
The store is a place that holds the app's state. It is very easy to create a store once you have reducers. We are passing store property to the provider element, which wraps our route component.
main.js
import React from 'react'

import { render } from 'react-dom'
import { createStore } from 'redux'
import { Provider } from 'react-redux'

import App from './App.jsx'
import todoApp from './reducers/reducers'

let store = createStore(todoApp)
let rootElement = document.getElementById('app')

render(
   <Provider store = {store}>
      <App />
   </Provider>,

   rootElement
)
index.html
<!DOCTYPE html>
<html lang = "en">
<head>
<meta charset = "UTF-8">
<title>React App</title>
</head>
<body>
<div id = "app"></div>
<script src = "index.js"></script>
</body>
</html>
Step 6 - Root Component
The App component is the root component of the app. Only the root component should be aware of a redux. The important part to notice is the connect function which is used for connecting our root component App to the store.
This function takes select function as an argument. Select function takes the state from the store and returns the props (visibleTodos) that we can use in our components.
App.js
import React, { Component } from 'react'
import { connect } from 'react-redux'
import { addTodo } from './actions/actions'

import AddTodo from './components/AddTodo.js'
import TodoList from './components/TodoList.js'

class App extends Component {
   render() {
      const { dispatch, visibleTodos } = this.props

      return (
         <div>
            <AddTodo onAddClick = {text ⇒dispatch(addTodo(text))} />
            <TodoList todos = {visibleTodos}/>
         </div>
      )
   }
}
function select(state) {
   return {
      visibleTodos: state.todos
   }
}
export default connect(select)(App);
Step 7 - Other Components
These components shouldn't be aware of redux.
components/AddTodo.js
import React, { Component, PropTypes } from 'react'

export default class AddTodo extends Component {
   render() {
      return (
         <div>
            <input type = 'text' ref = 'input' />

            <button onClick = {(e) ⇒ this.handleClick(e)}>
               Add
            </button>
         </div>
      )
   }
   handleClick(e) {
      const node = this.refs.input
      const text = node.value.trim()
      this.props.onAddClick(text)
      node.value = ''
   }
}
components/Todo.js
import React, { Component, PropTypes } from 'react'

export default class Todo extends Component {
   render() {
      return (
         <li>
            {this.props.text}
         </li>
      )
   }
}
components/TodoList.js
import React, { Component, PropTypes } from 'react'
import Todo from './Todo.js'

export default class TodoList extends Component {
   render() {
      return (
         <ul>
            {this.props.todos.map(todo ⇒
               <Todo
                  key = {todo.id}
                  {...todo}
               />
            )}
         </ul>
      )
   }
}
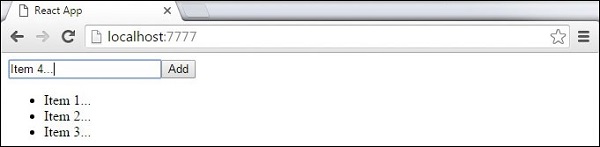
When we start the app, we will be able to add items to our list.
Comments
Post a Comment